
Internationalization (i18n) prepares your apps for a global audience in today’s interconnected world. If you’re a JavaScript or React developer looking for a lightweight, powerful i18n tool, you might like LinguiJS.
What is Lingui?
Lingui is an i18n framework for JavaScript, React.js, Vue, Next.js, Node.js, Angular, Svelte, and others. Its simple syntax makes it easy to get started with, and should be familiar for users of other React i18n libraries. Lingui uses the popular ICU MessageFormat for representing translations, and it uses the PO (gettext) and JSON formats for storing translations.
Lingui has a CLI tool with helpful commands for extracting messages for translation, tracking the number of translated messages, and compiling messages.
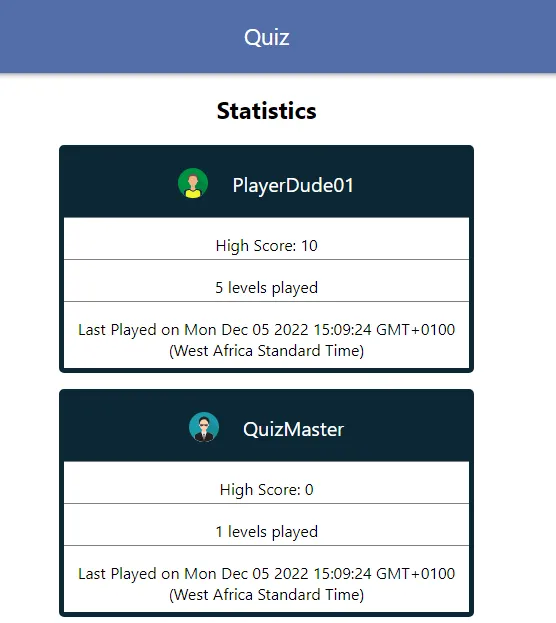
To demonstrate Lingui’s capabilities, we’ll localize the Statistics page of a fictional game. You can find the complete source code on GitHub.
Let’s install Lingui in the app.
Installing Lingui for React
I built the sample app with the Create React App starter template. If you want to install Lingui on any other React project that doesn’t use Create React App, follow this guide on Lingui’s website.
Set up LinguiJS with the following steps:
- First, install
@lingui/cli,@lingui/macro, and@lingui/react:
# Using npm
npm install --save-dev @lingui/cli @lingui/macro
npm install --save @lingui/react

# Using yarn
yarn add --dev @lingui/cli @lingui/macro
yarn add @lingui/react
- Then, create the LinguiJS configuration file
.linguircin the root folder of your project with this content:
{
  "locales": ["en", "fr"],
  "sourceLocale": "en",
  "catalogs": [{
    "path": "src/locales/{locale}/messages",
    "include": ["src"]
  }],
  "format": "po"
}
We’ll use English and French as the locales in this project. English is the source locale, so we’ll translate from English to French.
The path field tells Lingui where to store message catalogs for each locale. It will store the message catalogs for French in src/locales/fr/messages and the message catalogs for English in src/locales/en/messages.
- Finally, we’ll use the PO format to store our translations. Add these command line scripts to
package.json:
{
  "scripts": {
    "extract": "lingui extract",
    "compile": "lingui compile"
  }
}
These commands form an important part of Lingui’s internationalization and localization workflow. They’re responsible for extracting messages from the source code and compiling them so they’re ready for use in the app. Let’s start with a simple translation to see how they work.
Translating Simple Messages
Before we start translating, we’ll have to import the libraries we need in the index.js file:
import React from 'react';
import ReactDOM from 'react-dom/client';
import App from './App';
import './index.css';

// New imports
import { i18n } from '@lingui/core'
import { I18nProvider } from '@lingui/react';

const I18nApp = () => {
  return (
    <React.StrictMode>
      <I18nProvider i18n={i18n}>
        <App />
      </I18nProvider>
    </React.StrictMode>
  );
};

const root = ReactDOM.createRoot(document.getElementById('root'));
root.render(<I18nApp/>);
The i18n object contains the methods we’ll use for managing locales, message catalogs and formatting dates. The I18nProvider takes the i18n object as a prop which will allow <App/>’s child components to access to the i18n instance.
Now for the actual translation, we’ll translate the words “Quiz” and “Statistics” at the top of the page. To make the strings translatable, we’ll have to wrap them in a Trans macro:
// ...
import Card from './components/Card';
import { Trans } from '@lingui/macro';

function App() {
  // hardcoded for simplicity
  const players = [
    {
      name: 'PlayerDude01',
      image: athlete,
      levelsPlayed: 5,
      highScore: 10,
      lastPlayed: new Date()
    },
    {
      name: 'QuizMaster',
      image: bodyguard,
      levelsPlayed: 0,
      highScore: 0,
      lastPlayed: new Date()
    }
  ];

  return (
    <>
      <div className="App">
        <header className="App-header">
          <p><Trans>Statistics</Trans></p>
        </header>
      <div>
      <h2><Trans>Quiz</Trans></h2>
      <div>
        {players.map(function(player) {
          return (
            <Card player={player} key={player.name}/>
          );
        })}
      </div>
    </>
  );
}

export default App;
The <Trans> macro transforms the messages into components compatible with the ICU MessageFormat syntax, and it makes them messages available to the CLI tool for extraction. We’ll handle that in the next section.
Extracting Messages for Translation
The extract command will check our code for messages wrapped in <Trans> and put them in the message catalogs so we can translate them. Open your CLI and run this command:
# Using npm
npm run extract

# Using yarn
yarn extract
You should see this printed to the screen:
Catalog statistics for src/locales/{locale}/messages:
┌─────────────┬─────────────┬─────────┐
│ Language    │ Total count │ Missing │
├─────────────┼─────────────┼─────────┤
│ en (source) │      2      │    -    │
│ fr          │      2      │    2    │
└─────────────┴─────────────┴─────────┘

(use "npm run extract" to update catalogs with new messages)
(use "npm run compile" to compile catalogs for production)
After extracting the messages to the catalog, the extract command displays a table showing how many messages each locale has and how many messages we haven’t translated. The table shows there are two translations missing for the French locale and none for English. Since English is the source locale, there’s nothing to translate, and that’s why there’s a dash (-) in the “Missing” column.
Note: If you want to add a new locale to your project, add its key to the locales array in .linguirc and run the extract command.
Let’s add the missing translations to the message catalog.
Open src/locales/fr/messages.po and you should see the messages at the bottom of the file.
msgid ""
msgstr ""
"POT-Creation-Date: 2022-11-27 17:54+0100\n"
"MIME-Version: 1.0\n"
"Content-Type: text/plain; charset=utf-8\n"
"Content-Transfer-Encoding: 8bit\n"
"X-Generator: @lingui/cli\n"
"Language: fr\n"
"Project-Id-Version: \n"
"Report-Msgid-Bugs-To: \n"
"PO-Revision-Date: \n"
"Last-Translator: \n"
"Language-Team: \n"
"Plural-Forms: \n"

#: src/App.js:28
msgid "Quiz"
msgstr ""

#: src/App.js:31
msgid "Statistics"
msgstr ""
You should see the line numbers of the messages we extracted, and the message ids of the content <Trans> wrapped. We’ll add the translations for each message to the msgstr field:
#: src/App.js:28
msgid "Quiz"
msgstr "Quiz"

#: src/App.js:31
msgid "Statistics"
msgstr "Statistique"
Note: I’m using Google Translate, so the translations might not be totally accurate.
Next, we’ll have to compile the message catalogs to runtime catalogs. These runtime catalogs are minified .js files that allow us to use the messages in the app.
Open your CLI and run this command:
# Using npm
npm run compile

# Using yarn
yarn compile
You should now see a messages.js file in each locale’s folder.
We can now import the compiled messages into the app and load them:
import React from 'react';
import ReactDOM from 'react-dom/client';
import './index.css';
import App from './App';
import { i18n } from '@lingui/core'
import { I18nProvider } from '@lingui/react';

/** New Imports **/
import { messages as enMessages } from './locales/en/messages';
import { messages as frMessages } from './locales/fr/messages';

i18n.load({
  'en': enMessages,
  'fr': frMessages,
});

i18n.activate('en');

const I18nApp = () => {
  return (
    <React.StrictMode>
      <I18nProvider i18n={i18n}>
        <App />
      </I18nProvider>
    </React.StrictMode>
  );
};

const root = ReactDOM.createRoot(document.getElementById('root'));
root.render(<I18nApp/>);
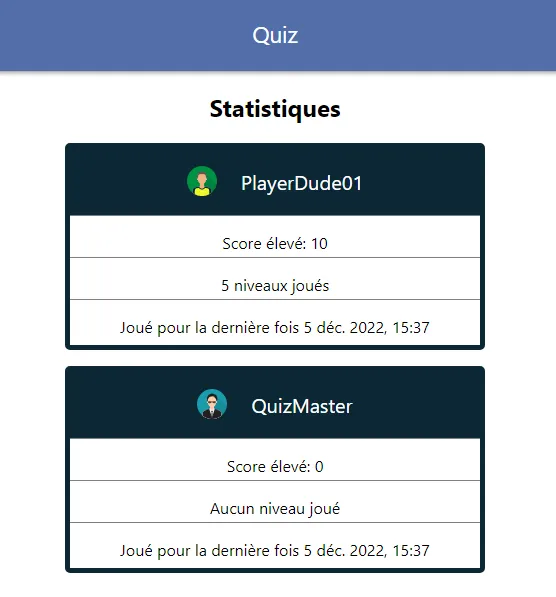
Great! We’ve imported the messages and set English as the current locale. Change the locale to French to see the translations:
i18n.activate('fr');

Note: English and French have the same word for “Quiz”, that’s why there are no changes there.
Setting up a message for translation in Lingui may seem like a lot, but it’s actually a 4-step process:
- Wrap the message you want to translate in a
<Trans>macro. - Extract the message to a translation file
- Translate the message
- Compile the translated message to a runtime catalog
Let’s translate another simple message: the “High score” message in the Card component:
import { Trans } from '@lingui/macro';

export default function Card({ player: { name, image, levelsPlayed, highScore, lastPlayed } }) {
  return(
    // ...
    <p className="player__info"><Trans>High Score: {highScore}</Trans></p>
  )
 // ...
}
Run extract, and take a look at the French message catalog:
#: src/components/Card.js:13
msgid "High Score: {highScore}"
msgstr ""
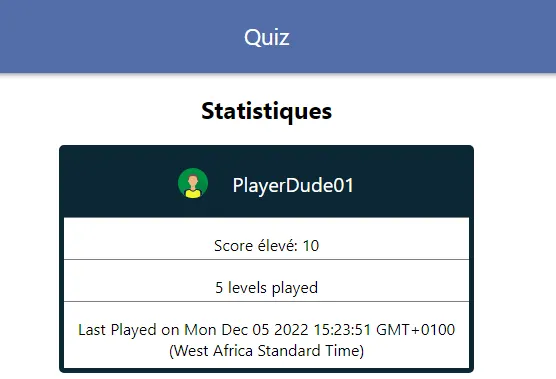
Lingui allows us to wrap variables and expressions in <Trans> so we can easily use them in our translations. Add the translation in front of the {highScore} variable:
#: src/components/Card.js:13
msgid "High Score: {highScore}"
msgstr "Score élevé: {highScore}"
Compile the message and see how it looks.
One more thing before we move on: We can give our messages a custom id with the id prop for <Trans>. For example: When we compile <Trans id="header.text">Statistics</Trans>, we’ll get this in the catalog:
msgid "header.text"
msgstr ""
That’s all for simple messages, let’s look at plurals next.
Working with Plurals

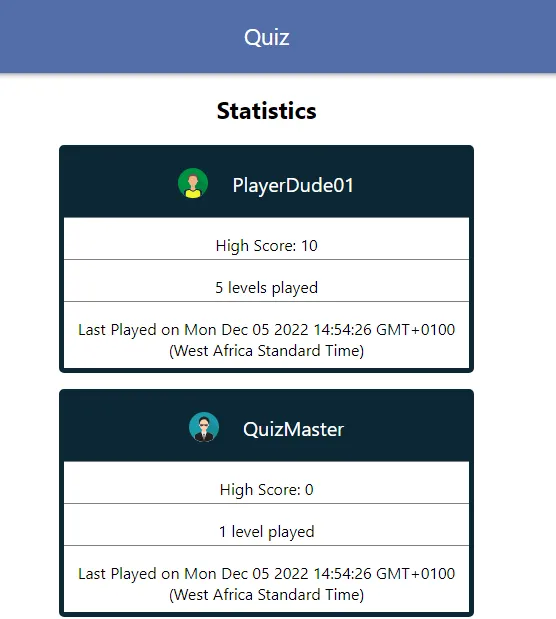
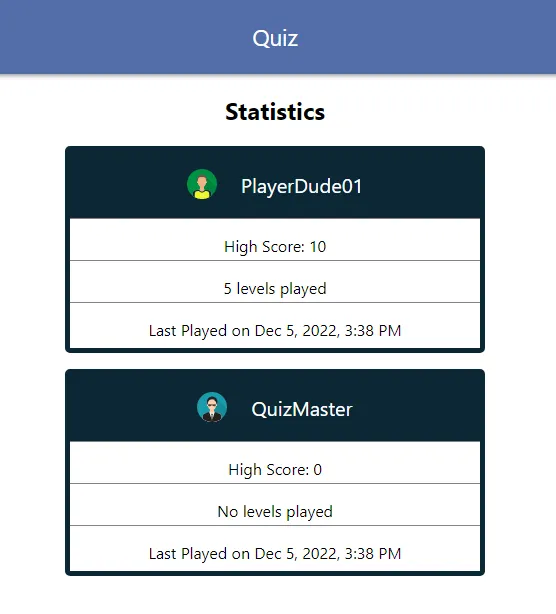
Looking at the cards in the app, we can see “5 levels played” for the first player and “1 levels played” for the second player. They appear this way because we’re not using any logic to handle plural forms. Of course, we could use conditional logic to solve this problem, but it won’t work well across different locales. Let’s see how Lingui handles this issue.
In Card.js, we’ll import the Plural macro:
import { Trans, Plural } from '@lingui/macro';

export default function Card({ player: { name, image, levelsPlayed, highScore, lastPlayed } }) {
  return(
    // ...
    <p>
    <Plural
      value={levelsPlayed}
      _0="No levels played"
      one="# level played"
      other="# levels played"
     />
    </p>
    // ...
  )
}
The <Plural> macro takes a value and plural forms as props so it can render the correct plurals based on the value and locale. “#” is a placeholder for levelsPlayed, so the code above will render “1 level played” when levelsPlayed equals 1. Numbers greater than 1 will take the form of the other prop, so when levelsPlayed equals 2, <Plural> will render “2 levels played”.
The <Plural> component also accepts exact forms so you can render specific messages for any number you want. For example, the _0 prop above will make <Plural> render “No levels played” when levelsPlayed equals 0.
Note: You should know the plural forms of your app’s source locale so you can pass the correct props to <Plural>. Check out the CLDR repository for the plural forms of languages.
Back to our code: Run extract, then open the French message catalog.
#: src/components/Card.js:15
msgid "{levelsPlayed, plural, =0 {No levels played} one {# level played} other {# levels played}}"
msgstr ""
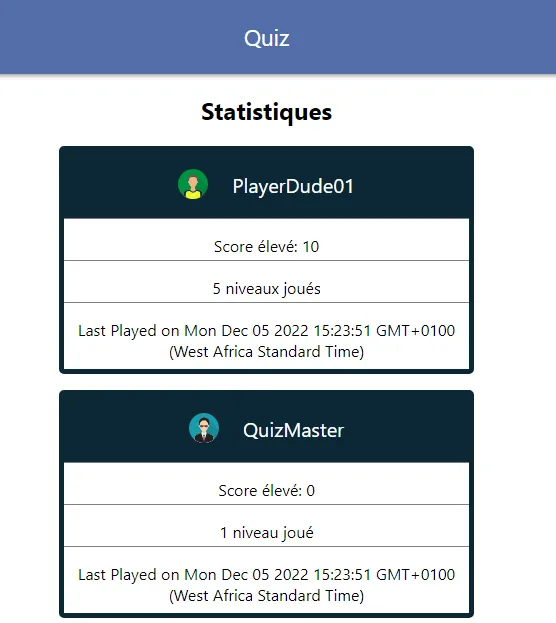
The code here is similar to what we’ve seen so far. Since we’re dealing with plurals, we’ll have to fill in the translation for each plural form. Copy over the content of msgid to msgstr and replace the English messages with the French translations:
#: src/components/Card.js:15
msgid "{levelsPlayed, plural, =0 {No levels played} one {# level played} other {# levels played}}"
msgstr "{levelsPlayed, plural, =0 {Aucun niveau joué} one {# niveau joué} other {# niveaux joués}}"
Compile the messages and the plurals should be working fine for both locales.
Formatting Dates
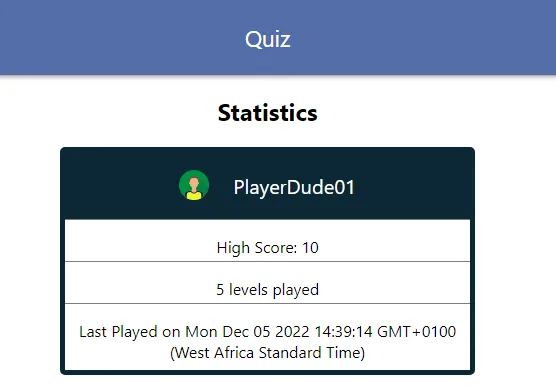
I used the new Date() constructor to store the dates each player last played the game. The string new Date() returns is quite long though, so a little formatting will make it look better.
We’ll use the i18n.date() method to format the dates. To access the i18n.date() method, we’ll have to import the useLingui() hook, which allows children of the root component to access the context we passed to <I18nProvider>:
import { Trans, Plural } from '@lingui/macro';
import { useLingui } from '@lingui/react';

export default function Card({ player: { name, image, levelsPlayed, highScore, lastPlayed } }) {
  // Access the current i18n instance
  const { i18n } = useLingui();
  //...
  return(
  //...
  <p className="player__info">
    <Trans>Last Played on {i18n.date(lastPlayed, {weekday: "short", hour: "numeric", minute: "numeric"})}</Trans>
  </p>
   //...
  );
}
The i18n.date() object takes two arguments: the message to be translated, and options for formatting. i18n.date() uses the Intl object under the hood, so the options parameter uses the same values that can be passed to the Intl.DateTimeFormat() method. You can check out all the date formatting options on MDN.
Run extract and open the French message catalog:
#: src/components/Card.js:23
msgid "Last Played on {0}"
msgstr ""
{0} is a placeholder for lastPlayed. How come we don’t see {lastPlayed} itself here instead? It’s because only simple values will appear with their names when compiled. Since we called i18n.date() on lastPlayed, it’s no longer a simple variable; that’s why Lingui compiled it to the positional argument, {0}.
Since Lingui has done most of the work for us, we only need to translate the text before the date:
#: src/components/Card.js:23
msgid "Last Played on {0}"
msgstr "Joué pour la dernière fois {0}"
Compile and voila! You should see the date properly formatted for both locales.
Creating a Locale Switcher
After translating messages in your app, the last step is to give users the option to change the language. We’re also going to make this locale switcher load messages dynamically. We only use one locale at a time so there’s no need to load more than one when our app starts. Let’s add that functionality first.
Adding Dynamic Message Loading
We’ll start by creating a new file to handle the loading logic. Create localeLoader.js in the root of the /src folder and fill it with this code:
import { i18n } from '@lingui/core';

export const locales = {
  en: "English",
  fr: "Francais",
};
export const defaultLocale = "en";

// We have to load and activate the default locale before dynamic loading
i18n.load(defaultLocale, {});
i18n.activate(defaultLocale);

export async function loadMessage(locale) {
  const { messages } = await import(`./locales/${locale}/messages`);
  i18n.load(locale, messages);
  i18n.activate(locale);
}
Since we’re handling all the loading in this file, we can safely remove the code from index.js.
import React, { useEffect } from 'react';
import ReactDOM from 'react-dom/client';
import './index.css';
import App from './App';

import { i18n } from '@lingui/core'
import { I18nProvider } from '@lingui/react';
// import the loader
import { defaultLocale, loadMessage } from './localeLoader';
/*
Remove all this code
import { messages as enMessages } from './locales/en/messages';
import { messages as frMessages } from './locales/fr/messages';

i18n.load({
  en: enMessages,
  fr: frMessages
});

i18n.activate('fr');*/
// ..
We’ll use the useEffect hook to load the default locale from the loader:
// ...
const I18nApp = () => {
  useEffect(() => {
    loadMessage(defaultLocale);
  }, []);
  // ...
}
Check out the app, and it should still work as before.
Adding the locale switcher
Let’s create a function to handle locale change and a state variable to hold the current locale:
// ...
const I18nApp = () => {
  function changeLocale(locale) {
    setCurrentLocale(locale);
    loadMessage(locale);
  }

  const [currentLocale, setCurrentLocale] = useState(defaultLocale);
//...
}
Define the props in App.js and create a select box with the locales as options:
// ...
import { locales } from './localeLoader';

function App({locale, handleLocaleChange}) {
// ...
  return (
    <div className="App">
      <header className="App-header">
        <p><Trans>Quiz</Trans></p>
      </header>
      <div>
      <h2><Trans>Statistics</Trans></h2>
      <select value={locale} onChange={ (e) => handleLocaleChange(e.target.value) }>
        {
          Object.keys(locales).map(function(key) {
            return (
              <option value={key}>{locales[key]}</option>
            );
          })
         }
      </select>
    // ..
  );
}
And finally, pass the current locale and the handler function to <App>:
<App locale={currentLocale} handleLocaleChange={changeLocale}/>
Done! You can now change locales and the app will load the messages dynamically.

Conclusion
We’ve come to the end of this tutorial. Through it, we’ve seen how Lingui’s syntax makes it straightforward to localize your app. With the CLI commands, developers have a simple workflow that allows them to extract messages and keep track of translations.
If you want to learn more about Lingui, here are a few resources you’ll find helpful:
- Lingui: Official Tutorial for React
- Lingui Macros API reference
- Lingui Core API Reference
- Lingui React API Reference
- Lingui usage examples
You can also check out Lingui’s official repository on GitHub.
